Monday, November 18, 2013

Holiday Card Workshop 2013 #4 (Day 3)


Day Three of Holiday Card Workshop encouraged CAS card making for the holidays. In reality, I usually don't do CAS except at holiday time when I am mass-producing enough cards to send to our friends and family. I would rather spend the majority of my crafting time making "special" cards geared to specific individuals who really appreciate the effort. (You know who you are ;)

This card is absolutely the simplest ever. The design is from Julie Ebersole, which I saw her do last year in the Ellen Hutson Classroom, if I remember correctly. 

I just love this die - Memory Box Country Landscape. There isn't much stamping involved. Drawing the "road" to look realistic and splitting the paper after die cutting was the most difficult thing about this whole card. I was able to whip up six of these in under an hour! A little glue pen and glitter along the edges and on the roof-tops and trees and it's good-to-go!


Die: Memory Box
Cards and matching envies: Impress
Ink, stamp, twine, glitter: Papertrey Ink


Holiday Card Workshop 2013 #3


Day Two of Holiday Card Workshop opened up a who new love for me - inlayed die-cutting using woodgrain veneers!  These or so easy and so much fun! I've had woodgrain veneer in my stash for awhile, but have used it mainly for die cutting images - those same images can be colored and reinserted into the sheet of veneer from which they came. Who knew?!!  The most difficult aspect is hanging onto all the little bits and pieces that come out after die cutting - you have to reinsert them onto the sheet after coloring and replacing the die cut - even down to the tiniest dot of veneer. No matter how hard I tried to contain them, I spent a lot of time searching for those little bits after die cutting. =)
 
Supplies: Dies from Memory Box, Impression Obsession and Papertrey Ink
Ink - Copic markers
Cardstock: PTI
Woodgrain veneer: Ellen Hutson


Holiday Card Workshop 2013 #2

Day One part two - another effective technique for the inside of a card is to carry through the theme from the outside of the card to the inside. Using both the negative and positive from die-cut words makes this technique fairly simple. I also created the panel that Peace is die cut into using quarter-inch strips of blue card stock. 
Stamps, die, ink, card stock, glitter (on single snowflake) from PTI
Other supplies: Cuttlebug embossing folder, Simon Says snowflake die 


Holiday Card Workshop 2013 #1


I love taking classes at Online Card Classes. Jennifer and Kristina are awesome instructors and bring together designers who are well known throughout the crafting world. There are always new techniques to learn and I am often reminded me of old ones I haven't used a ages.

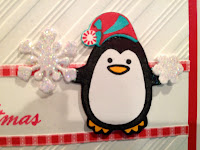
Day One Card focused on creating insides for holiday cards, though much time was spent working on the outside as well. This is a quick card using Papertrey Ink's Winter Penguin. Isn't he just the cutest penguin ever. The new-to-me technique involved partial embossing using embossing folder, so you get a strip of un-embossing area to use for stamping.

A lesson learned:  This embossing folder was a cheapy I picked up for a couple bucks at JoAnn's. I threw it away after I made this card, as it absolutely ruined several pieces of card stock before I finally found some 110lb white that didn't rip apart getting it out of the folder. It is true what they say, all embossing folders are not created equal! (A similar Tim Holtz folder is on order...)
All products are PTI except as stated above.